

How to deploy
Start a deploy any of three ways — all run kipmox: Deploy to Org:- Right-click in the editor — open a supported file, right-click anywhere, and choose kipmox: Deploy to Org.
- Right-click in the Explorer — right-click a supported file in the Explorer panel.
- Command Palette — press
Cmd+Shift+P/Ctrl+Shift+Pand run kipmox: Deploy to Org.
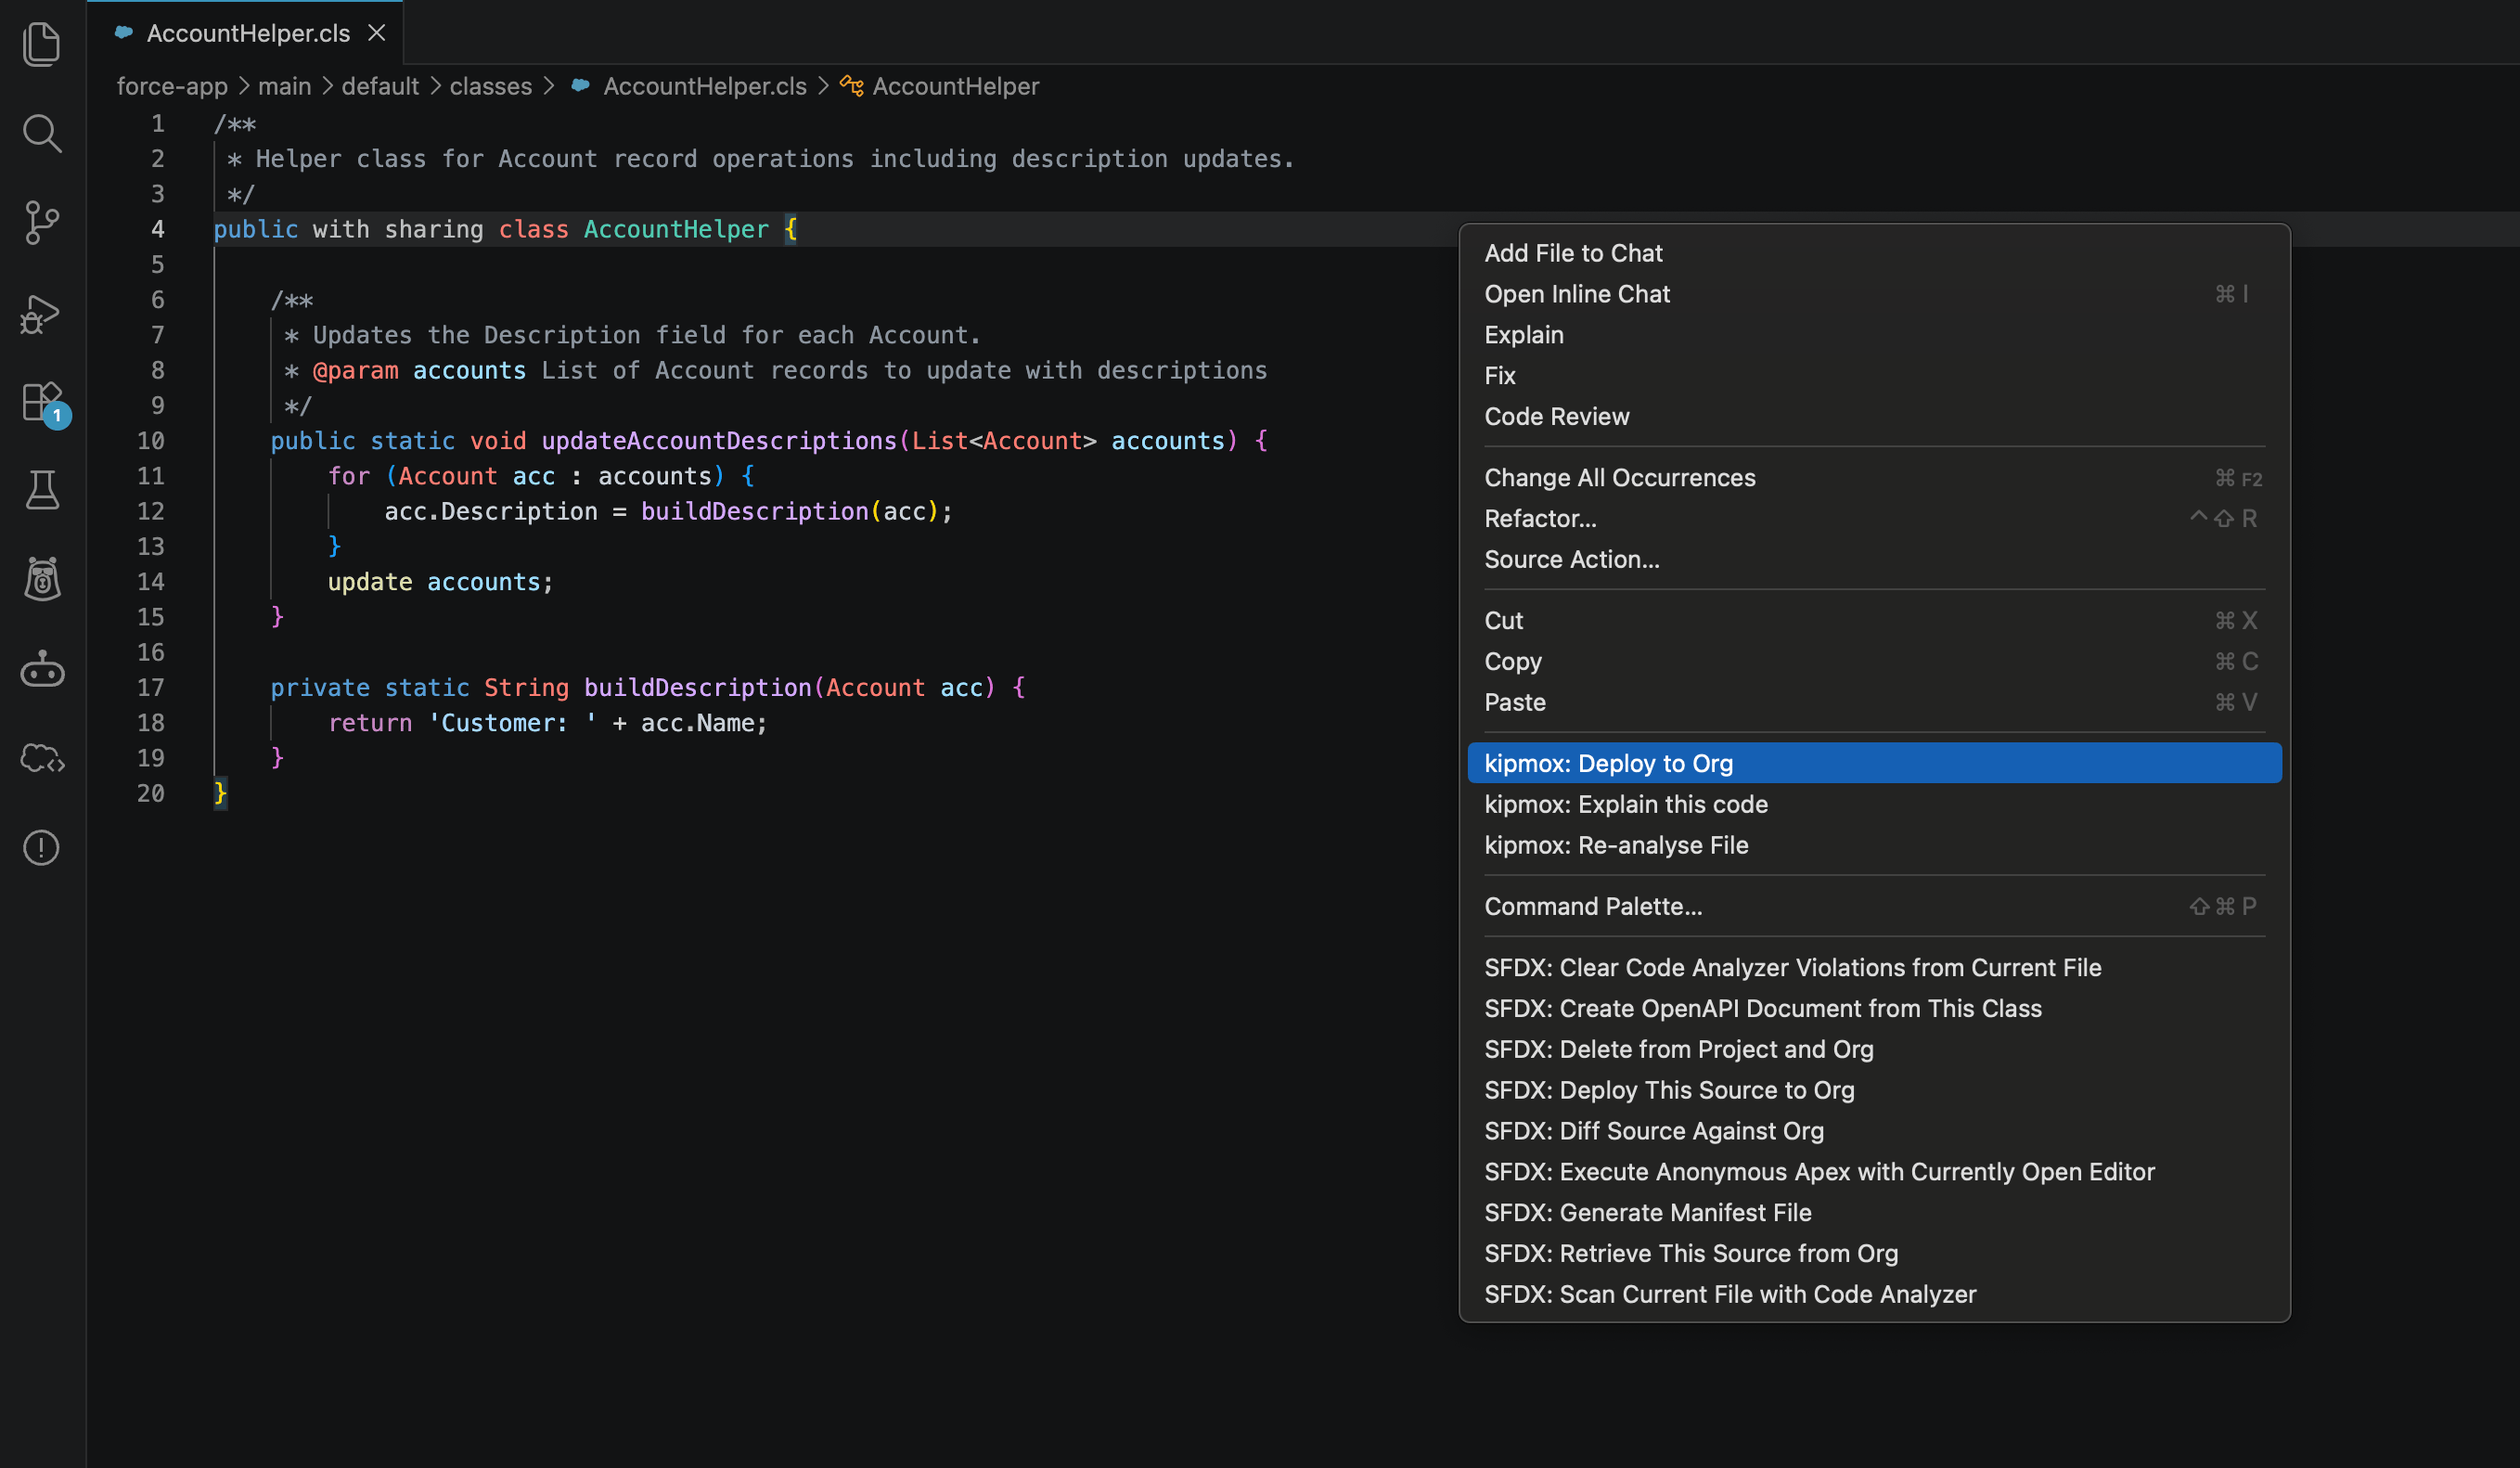
kipmox deploys to your current Salesforce CLI default org. Check or change it from the org name in the VS Code status bar before deploying.
On success
When the deploy succeeds, kipmox shows “kipmox: Deployment successful!” at the bottom of VS Code. Your code is live — nothing else to do.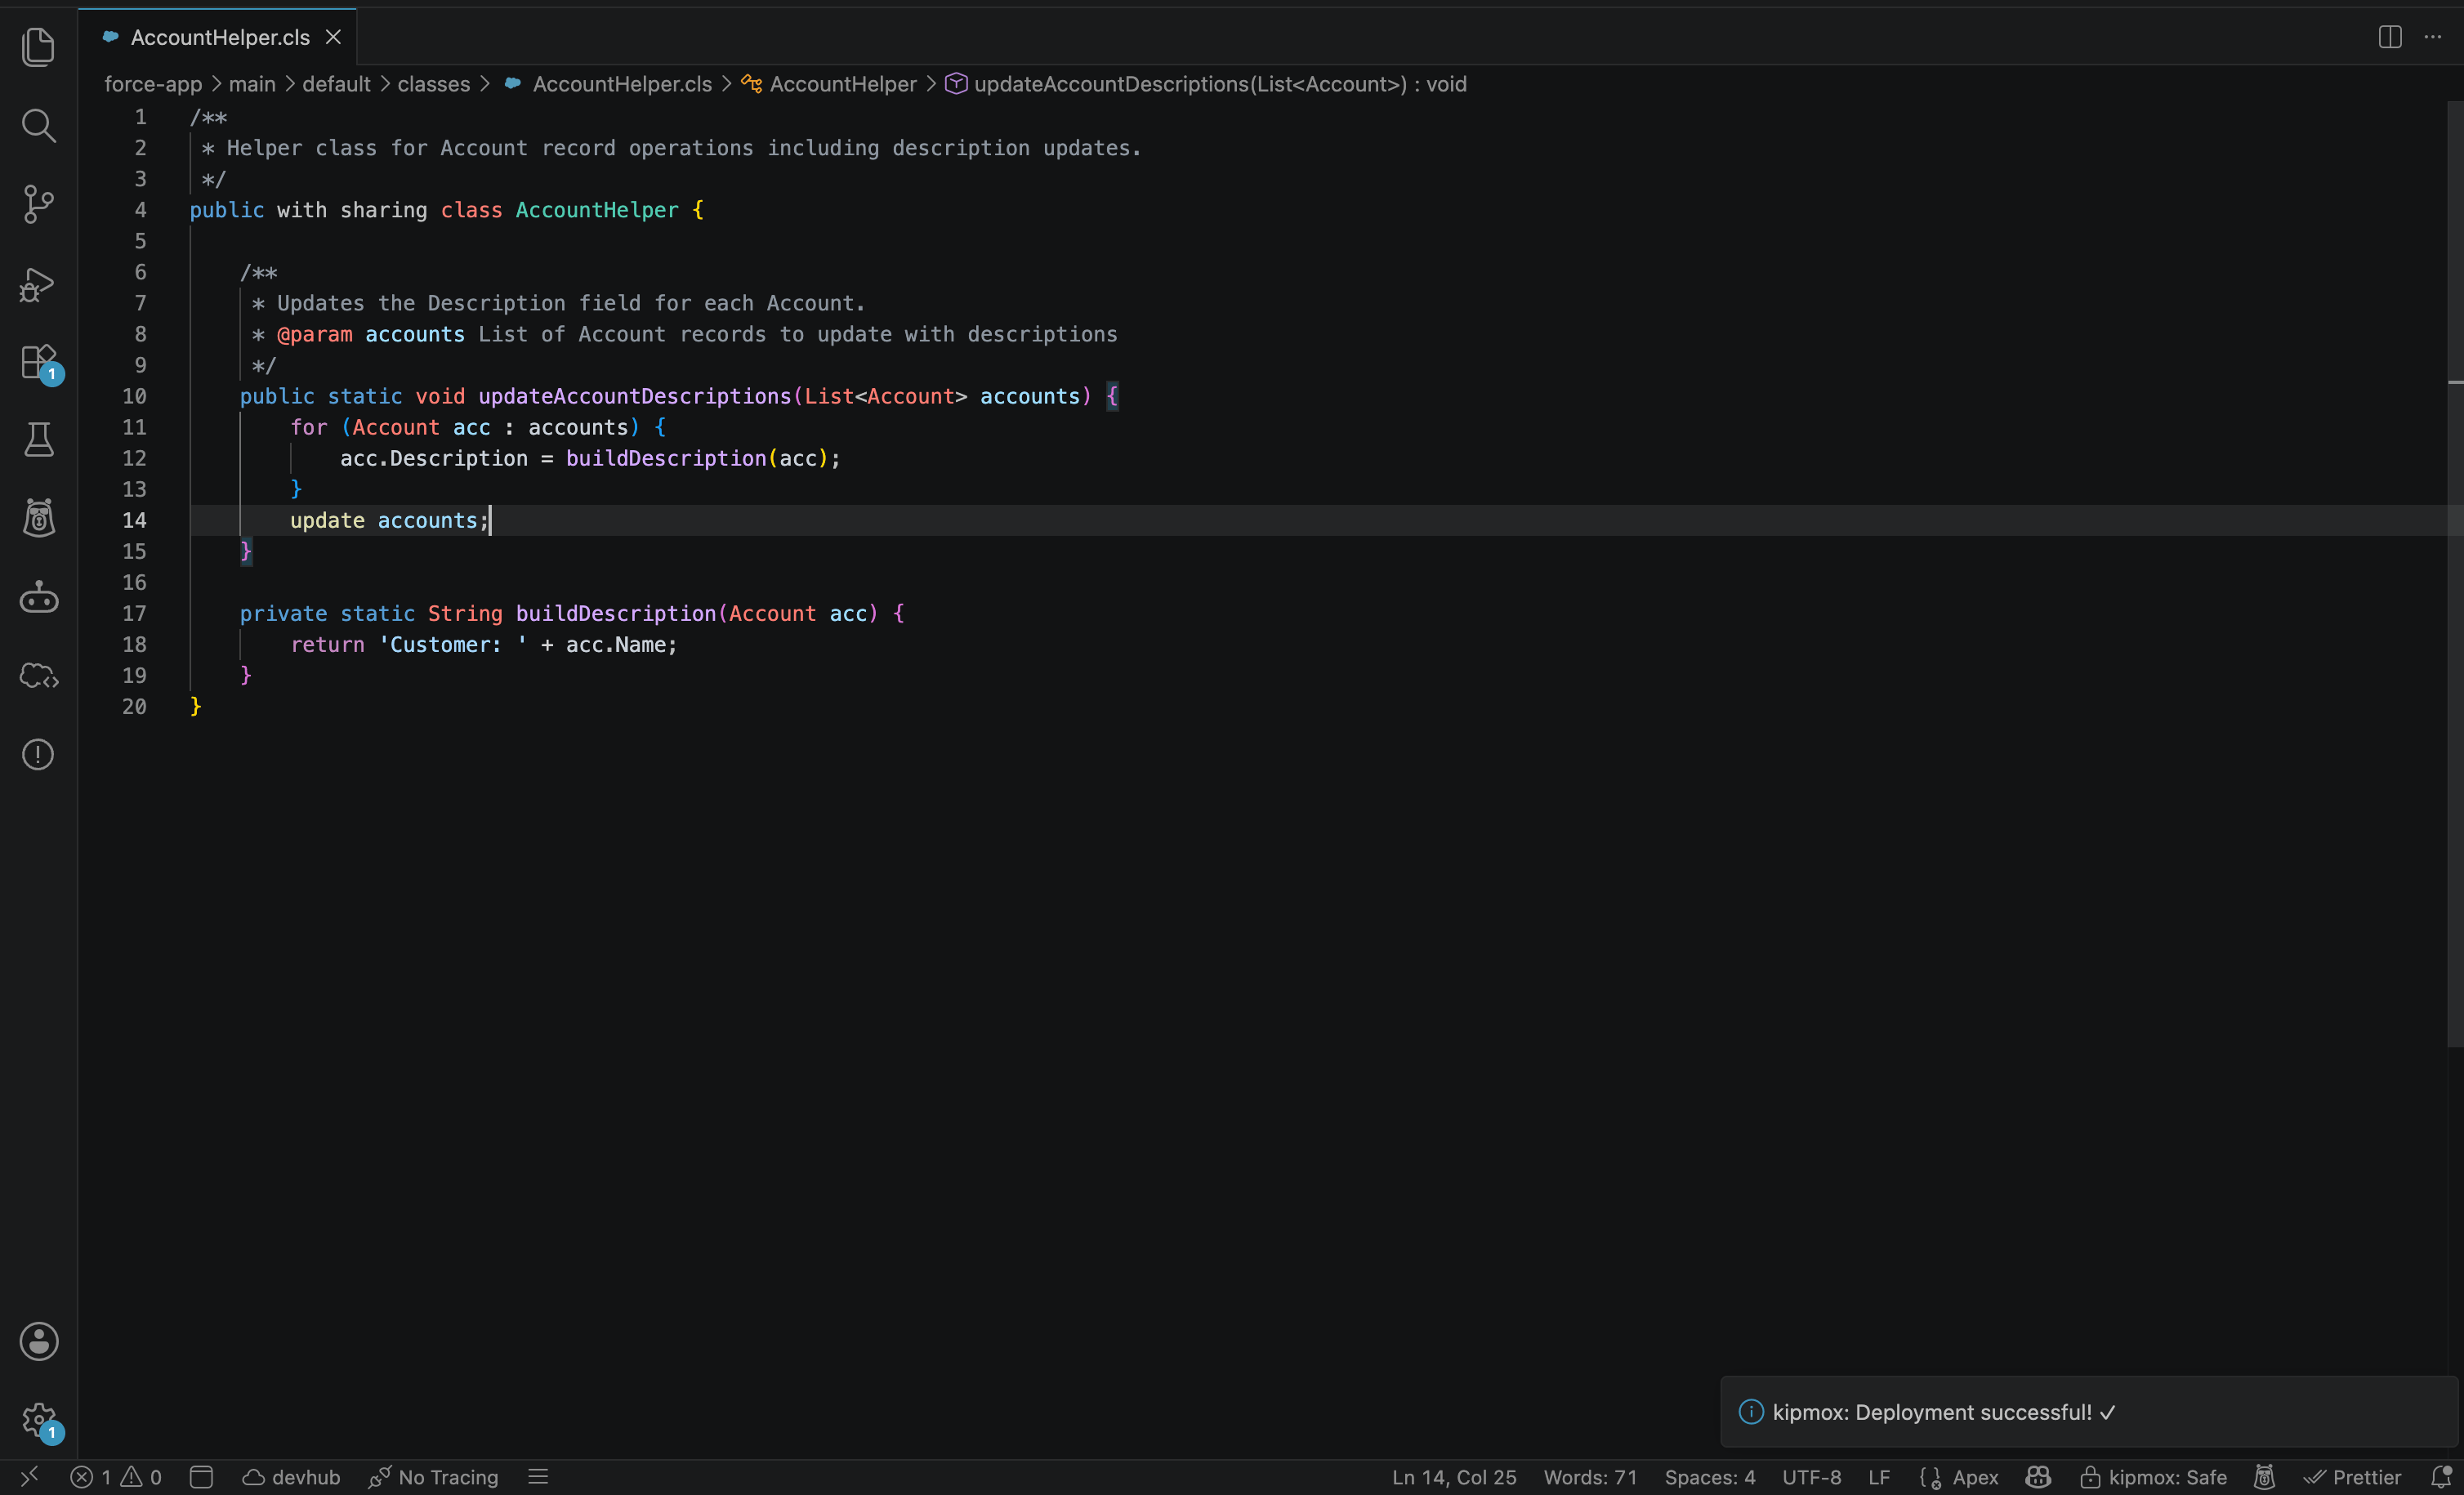
On failure — the Deploy Errors panel
When the deploy fails, kipmox shows “kipmox: n deployment error(s) found.” and opens the kipmox — Deploy Errors panel with every error:
Click Go to line on any error to jump your cursor straight to it (no AI used). Confidence and Risk appear only after kipmox generates a fix (via Explain or Analyze & Generate Fixes) — not on the raw error list.
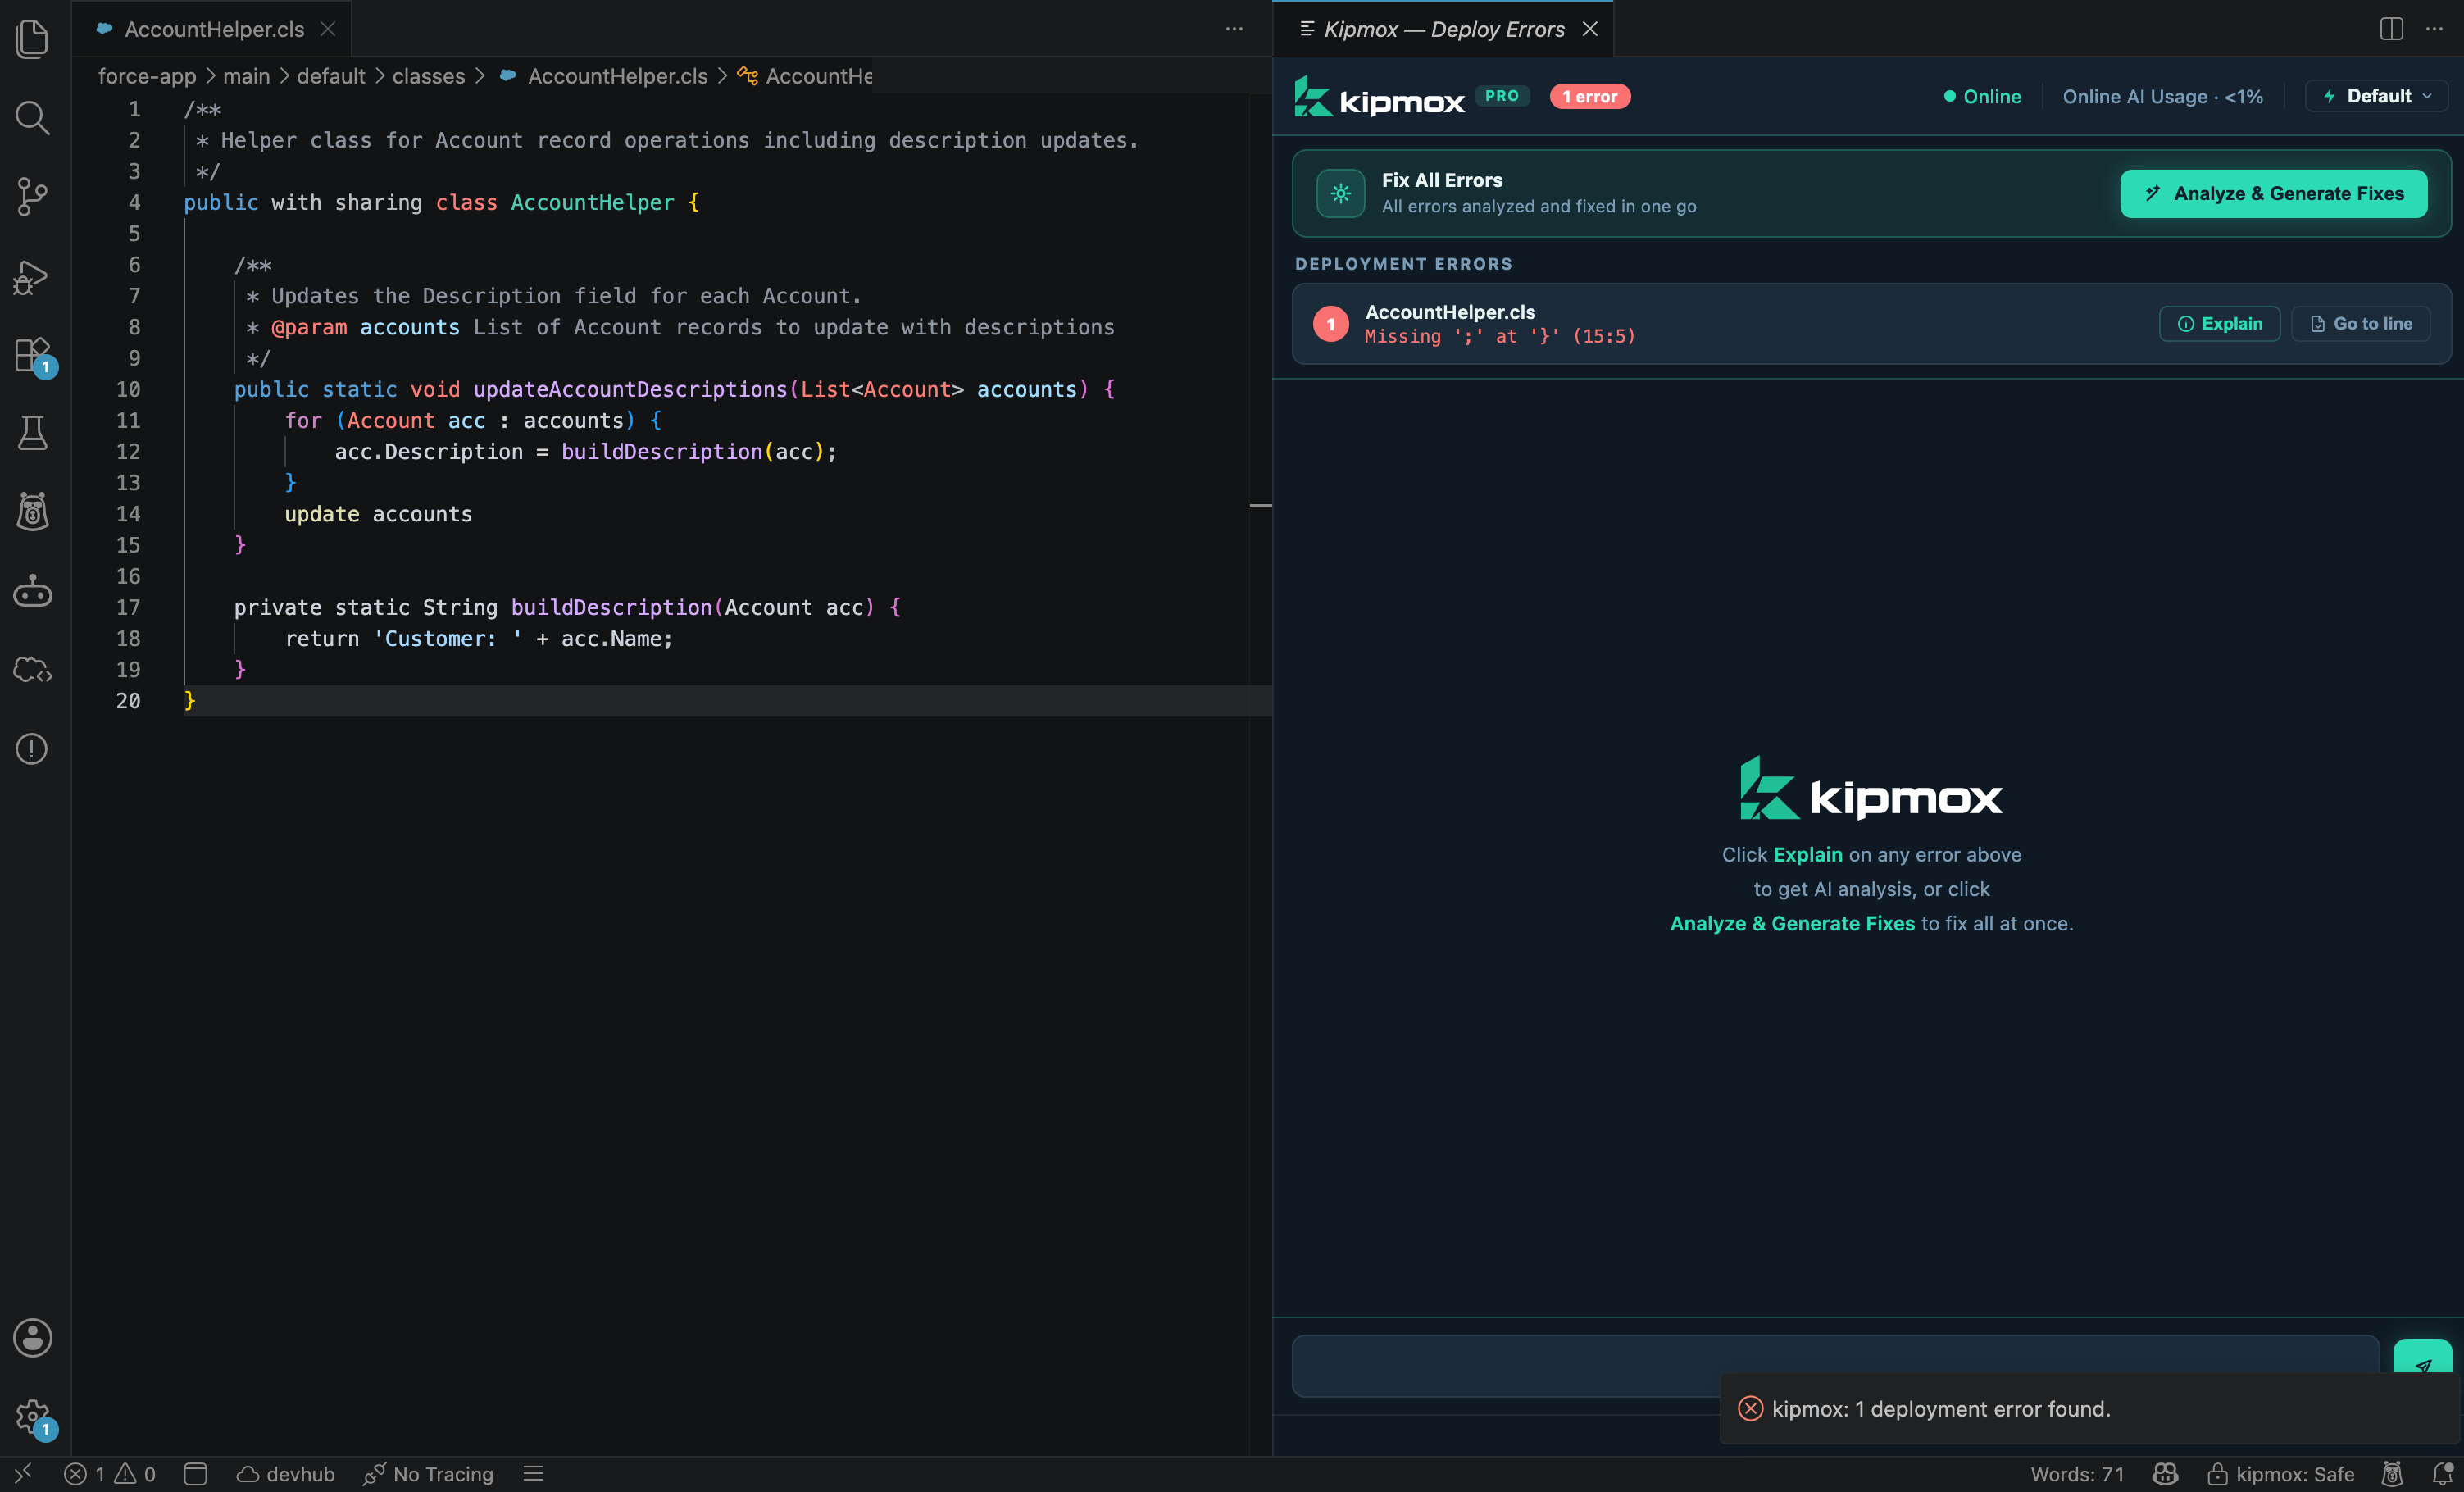
Each failed deploy refreshes the panel with the latest errors — it updates in place if open, or opens a new tab if closed.
Confidence & Risk
Every fix shows how sure kipmox is and what to watch for before you apply it:
Each fix also includes a What Changed summary. See How Fixes Are Verified.
Explain — understand any error
Click Explain on any error for a full analysis of that one error:- What it means in plain English
- Exactly why it’s happening in your specific code
- A suggested fix you can copy
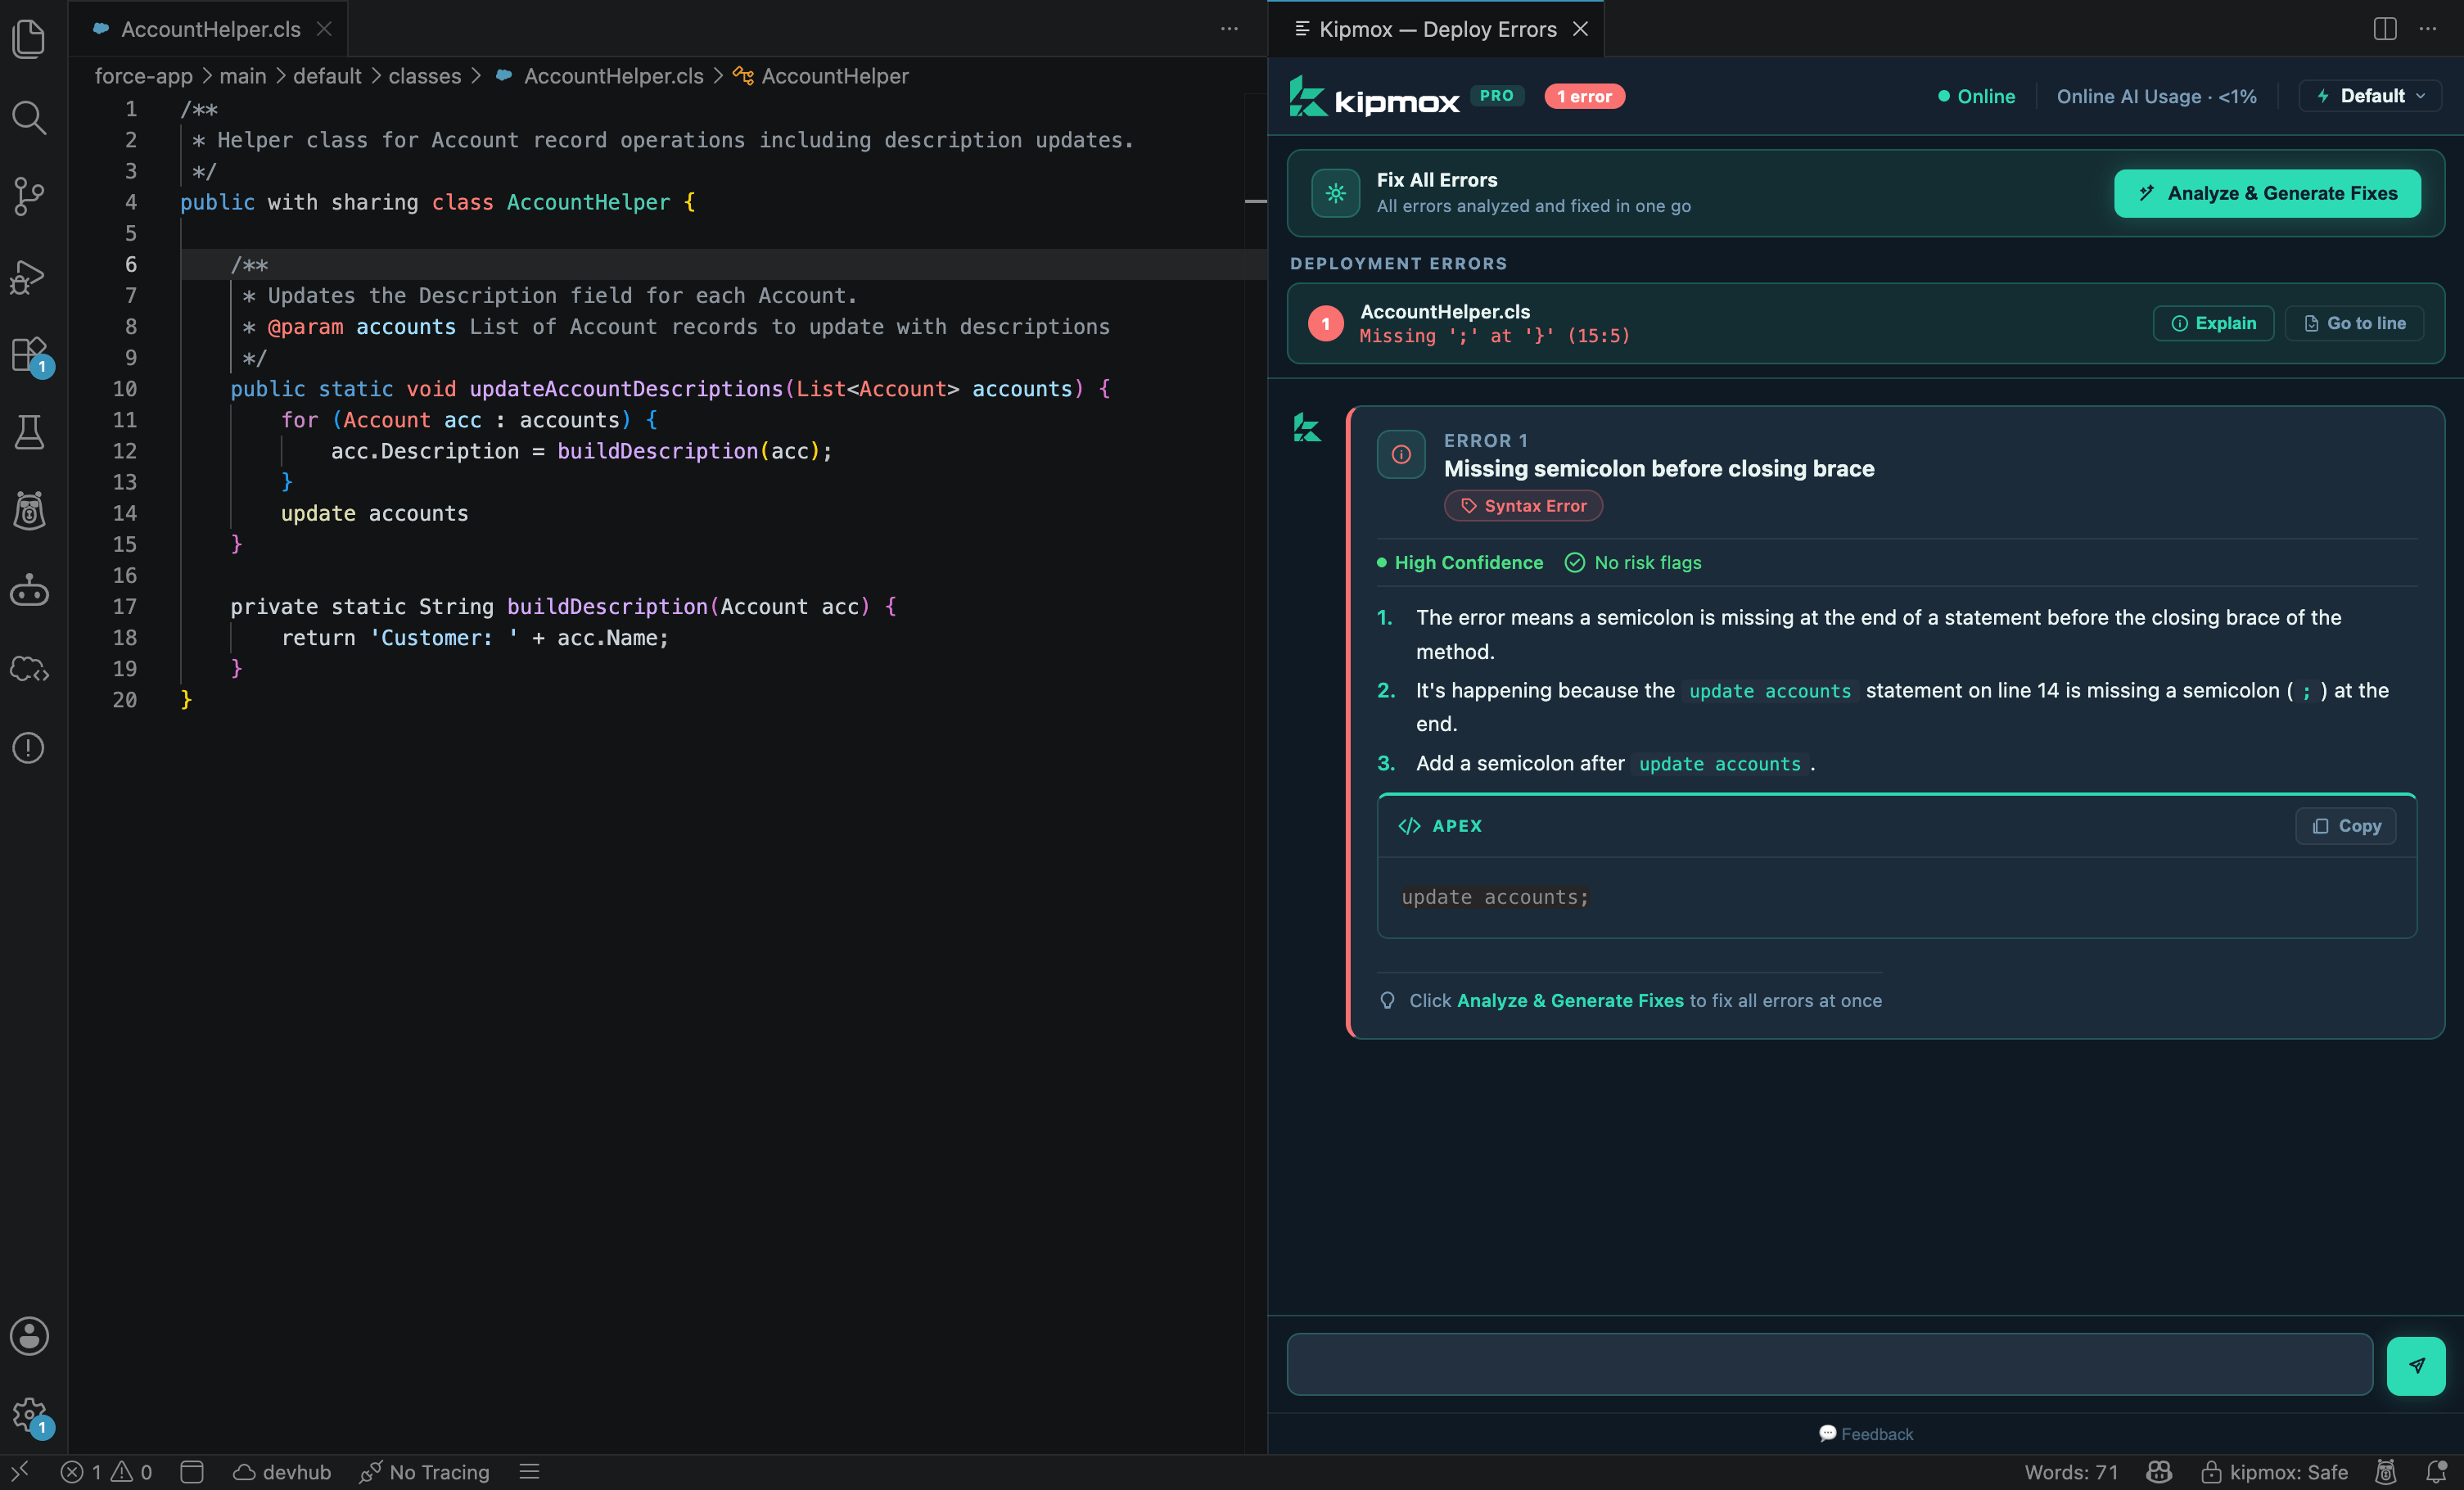
On the Free plan, this is how you fix errors: click Explain on each error and copy its suggested fix into your file. Free-plan fixes are limited to 15 every 4 hours — see Plans & Limits.
Analyze & Generate Fixes (Pro)
On Pro, click Analyze & Generate Fixes to generate a fix for every error at once. Each shows the Fixed code, a What Changed summary, and its Confidence & Risk. Then click Apply Fix. kipmox applies the change, saves the file automatically, and highlights the changed lines in green: “kipmox: Fix applied — changed lines highlighted in green. Undo anytime with Cmd+Z.” Your only action is to undo if you don’t want it — click Undo Fix or pressCmd+Z / Ctrl+Z. The auto-save is deliberate: it lets kipmox run its deterministic check on the saved file (see After applying fixes below).
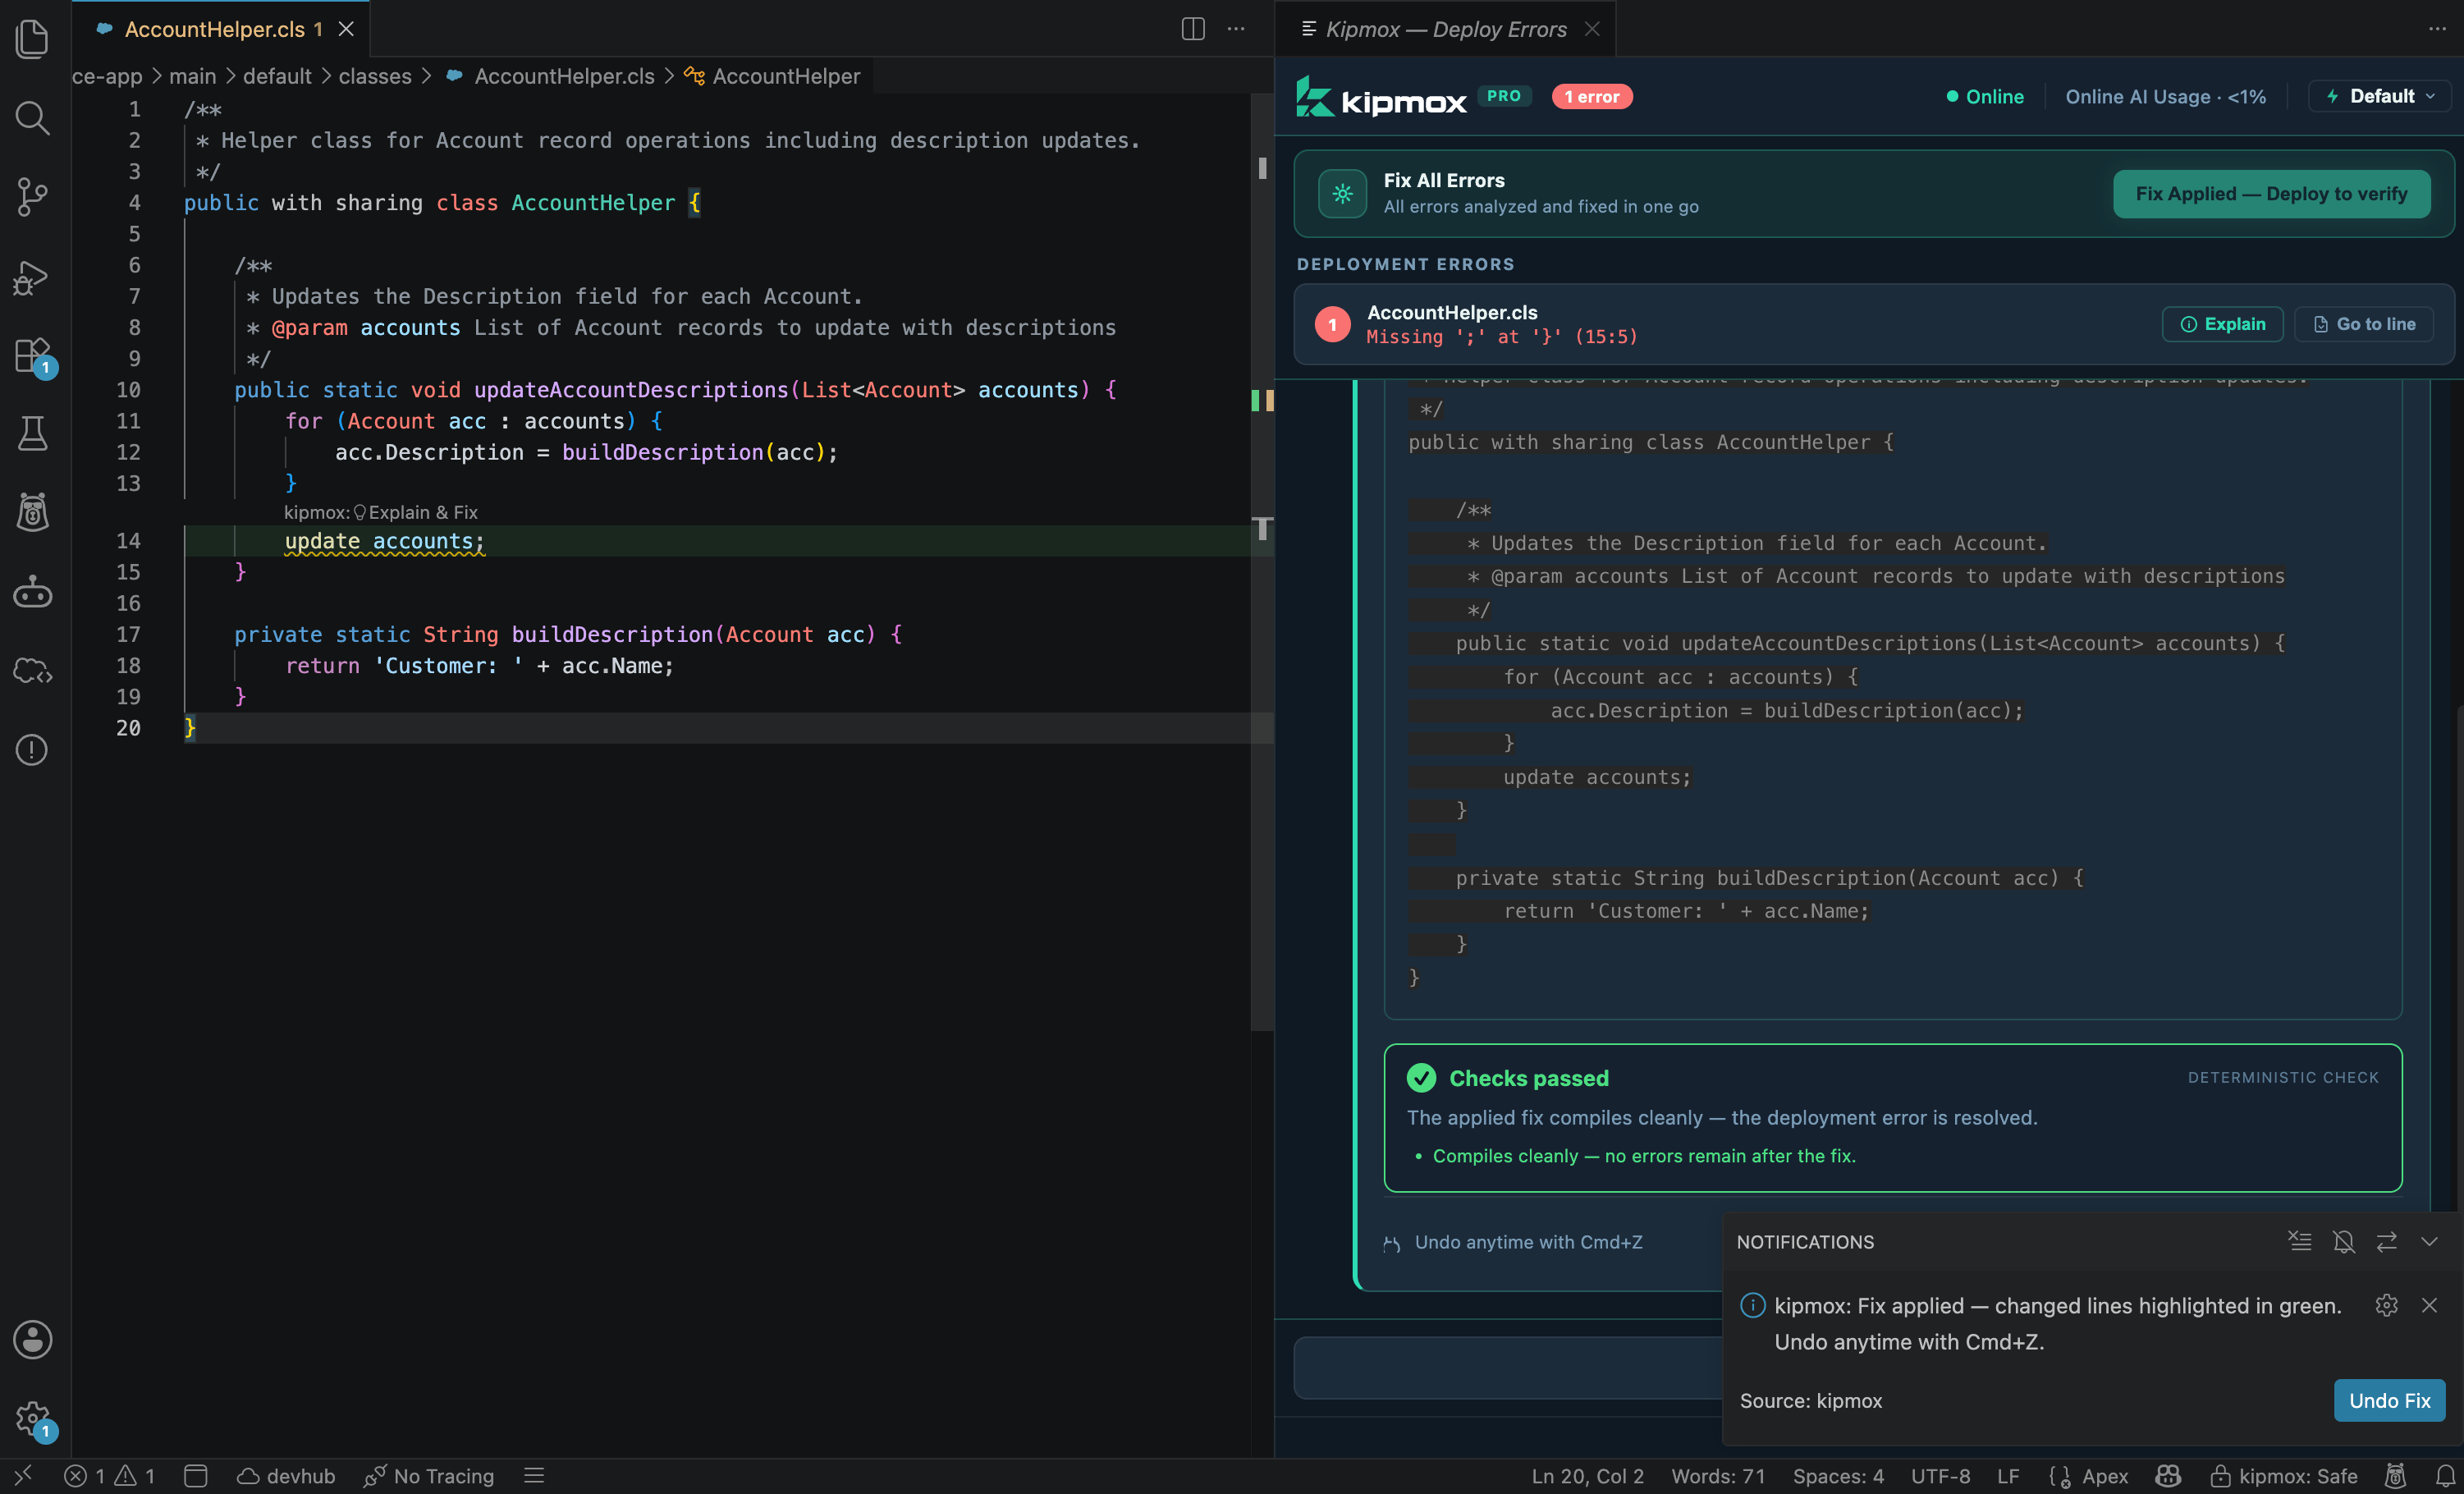
Apply Fix appears only after Analyze & Generate Fixes — the Explain view never has one. With Safe Mode (the default) you click Apply Fix; with Auto Fix Mode (Pro) generated fixes apply automatically.
After applying fixes
When you click Apply Fix, kipmox verifies the change with its deterministic check. For deployment fixes this runs after the fix is applied — the fix goes in, then kipmox re-checks it and shows a verdict (Checks passed / Review recommended / Validation failed). That’s the opposite order from analysis warnings, which are verified before you apply. See How Fixes Are Verified. Once your fixes are applied, run kipmox: Deploy to Org again. If it succeeds, you’re done; if new errors appear, kipmox reopens the panel and you repeat the cycle.Some errors are layered — fixing one can reveal another underneath. Repeat the deploy-fix cycle until it succeeds cleanly.
How kipmox understands your code
kipmox doesn’t just read the file you deploy — it builds context from your wider codebase to give more accurate fixes.LWC bundles
When you deploy any file in an LWC component folder, kipmox deploys the entire bundle and reads every file in it — the.js controller, .html template, .css, and .js-meta.xml. So when fixing a JavaScript error, kipmox knows what the HTML template expects, and vice-versa.
Apex dependencies
When you deploy an Apex class, kipmox reads the classes it depends on. If your class calls another class, kipmox has that context when generating fixes — so suggestions are based on your actual codebase, not just the file being deployed.Ask kipmox
The chat input at the bottom of the Deploy Errors panel lets you ask about your errors — request an alternative fix, or get more Salesforce context. On the Free plan, usage counts toward your 4-hour limits.Supported file types
XML metadata files (
.xml) can’t be deployed with kipmox in this release — only the code files above.Common issues
Deploy Errors panel didn't open after a failed deploy
Deploy Errors panel didn't open after a failed deploy
kipmox only monitors deploys started with kipmox: Deploy to Org. If you used the Salesforce CLI or SFDX commands directly, kipmox won’t detect the errors — deploy with kipmox: Deploy to Org.
Deploy succeeds but changes aren't in the org
Deploy succeeds but changes aren't in the org
You may be deploying to the wrong org. kipmox always deploys to your CLI default org — check it in the VS Code status bar.
Analyze & Generate Fixes shows Upgrade to Pro
Analyze & Generate Fixes shows Upgrade to Pro
Bulk Analyze & Generate Fixes is a Pro feature. On the Free plan, use Explain on each error and copy the fix into your file.
Fix applied but the deploy still fails
Fix applied but the deploy still fails
Some errors are layered — fixing one can reveal another. Run kipmox: Deploy to Org again and repeat until it’s clean.
LWC deploy failing on a file I didn't change
LWC deploy failing on a file I didn't change
LWC components deploy as a full bundle — all files in the folder go together. If another file in the bundle has an error, the deploy fails even if you only changed one. Check the panel for the specific file and line.
How Fixes Are Verified
The checks behind every fix
Safe & Auto Fix Mode
Control when fixes are applied